Now loading...
It has happened to all of us at one point or another. You write a 4,000 word report for your company and the next day when you open your computer you find it has been deleted by a virus. Or you took dozens of cool pictures of your birthday party and saved them on your computer’s drive but your nephew deleted them by accident. Or maybe you were working on a project and your machine crashed and when you re-started the computer the file went missing as you hadn’t saved it.
If you have suffered from any such setbacks we have a solution for you. It’s called iSkysoft.
The company started in 2004 when a group of young and energetic computer lovers gathered together. They started developing multimedia software for Windows. But soon Apple started gaining more users, they discovered that there was a gap in the market as Mac users needed multimedia software and there were little solutions available then. By 2005 iSkysoft Studio had started developing multimedia software which seamlessly supported the Macintosh platform. Today iSkysoft Studio is working in diverse fields. They started with only DVD software for Mac but soon launched more products for videos, YouTube, iPad, iPod, and iPhone. In this article I will focus on their software which lets you do data recovery on Mac. Gone are the days when you needed professional help from experts of the field to recover your lost data.
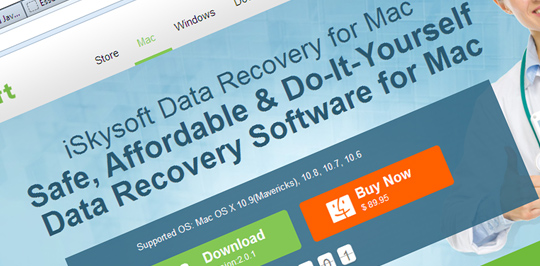
Today things have changed. With iSkysoft Data Recovery for Mac, anybody can do the task himself without needing any coding knowledge. This software lets you recover lost files in just three simple steps: Scan, Preview and Recover. The software comes in four recovery modes which recover virtually all data loss cases. Using the latest powerful scanning algorithms, the software can scan any Mac based hard drive or external hard drive without deleting any data and allows you to recover images, videos, documents, music, archive files and email messages very quickly and easily. Let me show you how it’s done. First of all the four methods of recovery allowed by the software are:
- Lost data recovery
- Raw data recovery
- Partition recovery
- Resume recovery
I deal with each one of them below.
1) Lost Data Recovery Lost Data Recovery mode allows you to recover lost data when it has been accidentally deleted by the pressing of Command and Delete keys together, deleted by emptying of the trash can, corrupted files, etc. When you click the Lost Data Recovery mode the window will appear like the one shown below.

You should now select the drive where you have lost your files and then you should click the Scan button on top to start the scanning process. In case your drive doesn’t show in the list you should click the Refresh Drives button at the bottom and it should appear. When the scanning process is completed a new window will open up as shown below. Here you can preview the files before starting the recovery process. In order to recover them, check the files in the list and then click the Recover button to save the files where you desire. It is recommended that you don’t save them in the same position where you lost them but in some other drives.

2) Raw Data Recovery You can use this Raw Data Recovery mode to perform a deeper scan and recover the files by their file signature or type. In this recovery mode you are allowed to recover up to 50 types of files which include PNG, JPG, MOV, M4V, M4A, MP3, PAGES, ZIP, and EML. The only disadvantage of this recovery method is that the original file names and file folders will remain unavailable.

Choose a drive or the complete disk as you want and then click the Scan button. In case you have lost or formatted a partition select the whole disk. You can also try Refresh Drives option if your partition is not in the list. When the scanning process is completed check the files you want and click on the Recover button to save them to an external storage device. 3) Partition Recovery In the main interface of the screen click Partition Recovery to use this recovery option. Choose the disk you wish to recover and then click on Search Partition on the top of the screen to start scanning the lost, formatted, resized and corrupted partitions.

4) Resume Recovery In some cases the scanning might take hours to complete. If for some reason you had to switch off your computer you can save the scan process until where it was completed and then resume it when you return. Click the Pause or Stop button first and then click the Save Scan Info button in order to save a .res file on your computer.

Go and check out the software and then let me know what you think in the comments below. Bonus for Readers: 5 lucky SmashingApps readers will be awarded with registration codes for iSkysoft Data Recovery for Mac. You just need to comment about this review here and share it on your social network, and then send the screenshot of it to iSkysoft’s Facebook page. We’ll then choose the lucky ones to send the codes.
Now loading...


